After you deploy a server using WPCloudDeploy you have multiple options to help protect it and keep it running properly.
1. Turn On Malware Scanning & Detection
Before you do anything with your new server, you probably want to check the reputation of the IP address it was assigned. Many IP addresses can be placed on “blacklists” for activity that occurred years prior – if your new servers’ ip is one of those it can cause all kinds of future issues.
You can check the ip reputation using a site such as this one: https://www.virustotal.com/gui/home/url
If it turns out your new IP is on a blacklist, you’re probably better off trashing the server and recreating a new one with a new IP – it will save you lots of headaches in the long run.
Once you’ve verified your IP’s reputation, you want to keep it intact by making sure your server remains free of malware and other pests.
Malware scanning and detection is an easily deployable feature on WPCD servers that contain at least 2 GB of memory (technically 1 GB is enough but most servers with 1 GB of memory don’t report the full 1 GB as being available).
To turn it on:
- Go to WPCloudDeploy → All Cloud Servers and click on the title of your new server
- On the SERVICES tab, scroll down to the MALWARE & VIRUS SCANNER section
- Enter your email address and click the INSTALL button.
One thing to keep in mind is that you will not get email notifications unless you install the EMAIL GATEWAY (see item 5 below.)
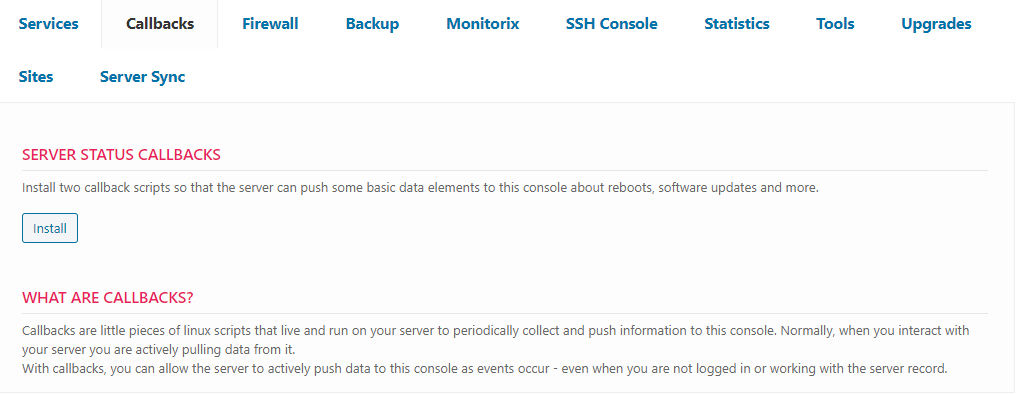
2. Verify Callbacks are Installed
Callbacks will allow your server to push data to the plugin on a regular basis instead of waiting for you to request it. These are usually installed automatically. But, if they’re not for some reason (eg: you might have turned them off in SETTINGS), you can manually install them as follows:
- Go to WPCloudDeploy → All Cloud Servers and click on the title of your new server
- On the CALLBACKS tab just click the INSTALL button for the callbacks you would like to install.
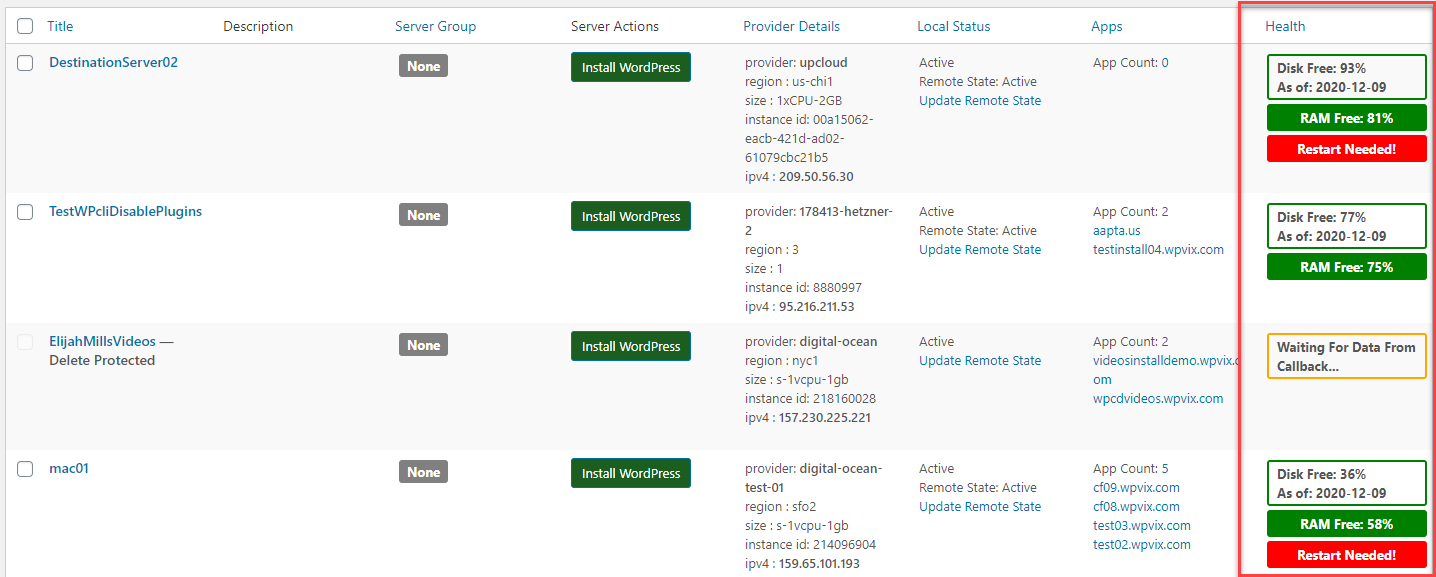
When callbacks are installed, you can see your server’s health status directly in your server list:
Tip: If you want to ensure all your new servers automatically install the CALLBACK scripts after deployment, you can turn on an option in WPCLOUDDEPLOY → SETTINGS → APP:WORDPRESS SETTINGS. The option is located under the SERVERS sub-tab – see image below:
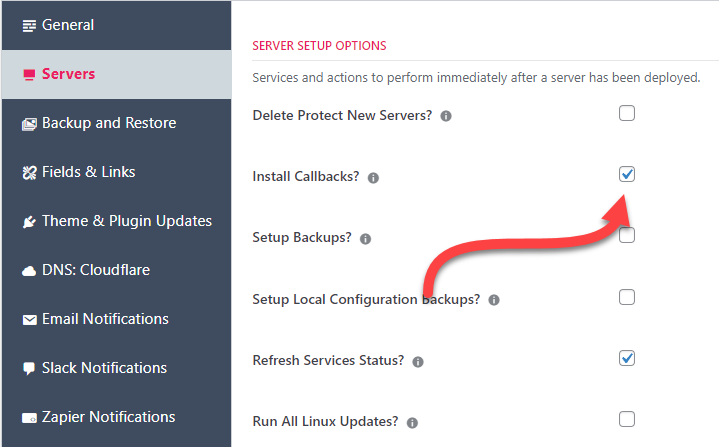
Usually this option is turned on but if, for some reason it’s not, that’s where you find it in the SETTINGS area.
3. Install An Object Cache
WPCD offers a choice of two object caches – MemCached and REDIS.
We recommend REDIS and this is automatically installed on all new servers.
If, for some reason, it’s not installed on your server, you can do so as follows:
- Go to WPCloudDeploy → All Cloud Servers and click on the title of your new server
- On the SERVICES tab, scroll down to either the MEMCACHED or REDIS section.
- Click the corresponding INSTALL button.
Once installed, you’ll be able to activate the cache on a per-site basis.
4. Setup Server Level Backups
We recommend you set up multiple levels of backups. Start with turning on the IMAGE level backup option at your cloud provider. That will be your last line of defense if something goes wrong and you need to restore a server.
After that, you can turn on a server level backup for all your WordPress sites in the WPCD console – this backs up all WordPress sites to Amazon S3 (or a compatible S3 endpoint).
With your providers’ IMAGE level backups you can only restore the entire server. With our backups you can restore individual sites.
So, if something goes wrong with a site, you can restore it without shutting down the entire server. But if something does go wrong with the rest of the server or you need a non-WordPress file you can still recover by restoring the entire server from your providers’ image level backups.
You can turn on our WordPress sites server level backups as follows:
- Go to WPCloudDeploy → All Cloud Servers and click on the title of your new server
- On the BACKUP tab enter your AWS S3 credentials.
- Click the SAVE CREDENTIALS button. The screen will refresh after the save and you will need to select the BACKUP tab again.
- Scroll down to the AUTOMATIC BACKUPS section and turn those on.
You should also strongly consider adding a backup plugin to all your sites.
A backup plugin gives you a third level of protection and, in some cases, is far more convenient for restores since you can do them without leaving the WordPress site. If you do implement this option, send the backups to a location or service other than AWS S3. This way your backups are stored in multiple locations.
5. Install An Email Gateway / Relay
Most cloud server services will prevent servers from being used to send emails. This is a security precaution to make sure that servers aren’t used as spam relays.
But, this means that server level emails such as those from our Malware scanner will not be sent out until you set up an email relay for the server.
We recommend that you do not use your regular email account for sending email if you’re going to send a lot of emails. Instead, use MAILGUN or SENDGRID. This increases your deliverability rate and reduces the amount of your emails and ends up in spam boxes.
To set this up:
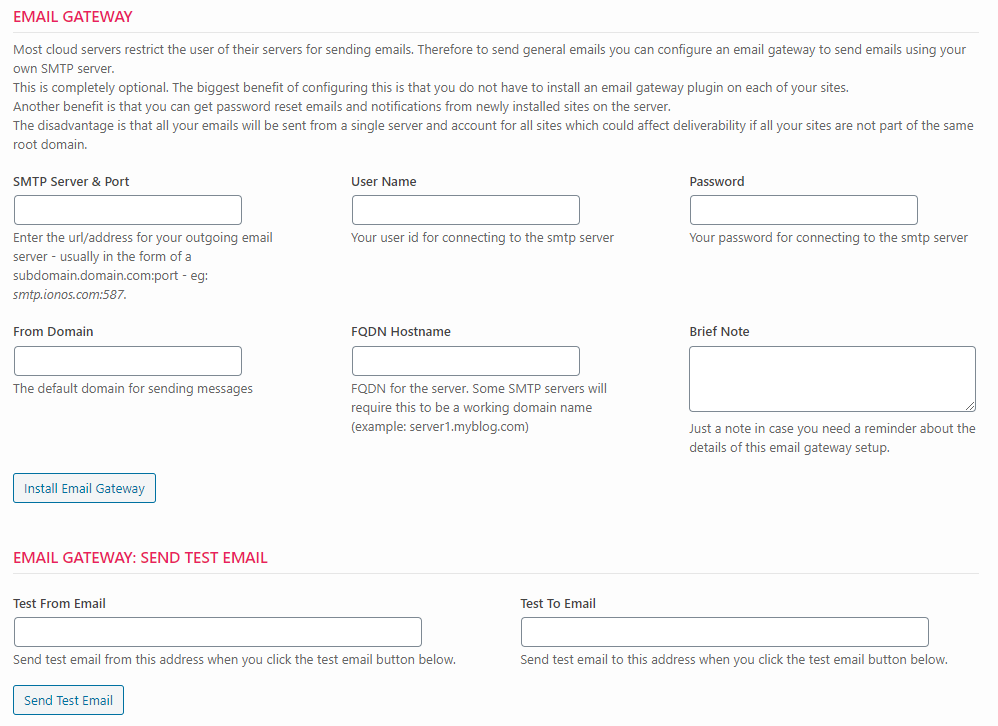
- Go to WPCloudDeploy -> All Cloud Servers and click on the title of your new server
- On the SERVICES tab, scroll down to the EMAIL GATEWAY section
- Enter the requested data and click the INSTALL button.
There is one downside to using a gateway like this – you have less flexibility in setting the “FROM” portion of your outgoing emails. This is not an issue if you have just one site on your server or multiple related sites. But if you have multiple unrelated sites, you might want to also use an SMTP plugin instead [for each site]. See our 8 Best-Practices For Sites Built On WPCloudDeploy Servers article for more information about this option.
With the SMTP gateway installed, server operations that need to send emails will succeed (eg: malware scans). With the SMTP plugin installed on each site, emails can be more personalized for the site.
Bonus: Firewalls
For most users, the simplest way to implement a firewall is to place sites on the server behind a proxy such as CloudFlare. Then do NOT give out your server’s IP address to anyone.
But, that’s not foolproof since there are bots that are scanning ip address ranges looking for servers. So, your next step is to install a software stack known as FAIL2BAN.
- Go to WPCloudDeploy → All Cloud Servers and click on the title of your new server
- On the FAIL2BAN tab click the INSTALL FAIL2BAN button.
Fail2ban can help with performance because it will filter out a large amount of traffic before it ever hits your WordPress site. Loading WordPress to respond to a request is a heavy operation so restricting traffic before it gets there always contributes to better performance..
Revision History
- Last updated 05-05-2024 for minor grammar and clarification issues.
- Last updated: 09-24-2023
- Revised: 12-16-2021
- Originally written: 10-03-2020
Was This Article Useful? Or do you have questions or comments about it (or our products & services)? We'd love to hear from you!
Automatic Notification Of New Articles
Sign up to get automatic notifications of new articles. This is a different list than our standard list - you only get new articles once a week (usually on Mondays). No other emails will be sent unless you sign up for our general list as well.
Follow us on Twitter! We post a lot of cool things there first. To keep up, click the "X" below!