Git Push-To-Deploy
Git Push-To-Deploy is the easiest way to integrate with Git. To configure it, all you need are:
- Git installed on your server
- Git credentials setup for your site and linked to a remote repository
- Git webhook and secret key added to your Git provider (GitHub)
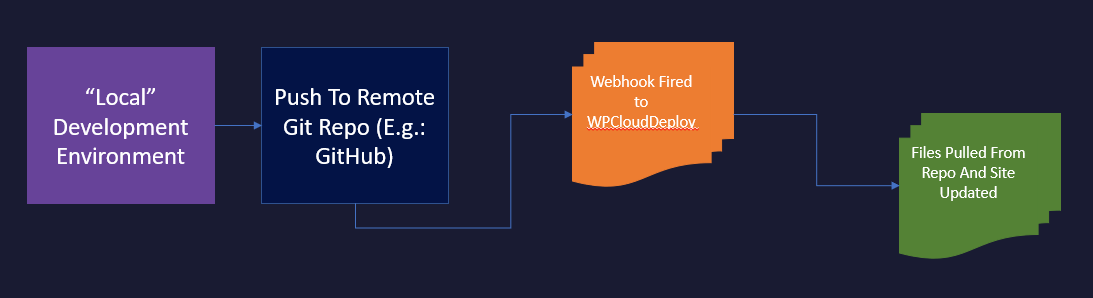
The file-flow is linear, one-way, as follows:
Setup Git Credentials For A Site
Navigate to the GIT tab on the site you’re working with.
Fill in at least the following fields (if they are not yet setup in your Global settings area)
- The url for the Remote Repository that will be linked to the site
- Email Address used for your Git Provider account
- The display name that will be used by Git
- The user name for your Git Provider account
- The API token created in your Git Provider account
- A primary branch – usually ‘master’ or ‘main’
Click on the SAVE CREDENTIALS button. This will setup credentials for the site but will NOT create a local git repository on the server.
If credentials are saved successfully, the screen will refresh and two new sections will appear at the bottom of credentials area:
- Push-To-Deploy Actions
- Push-To-Deploy Keys
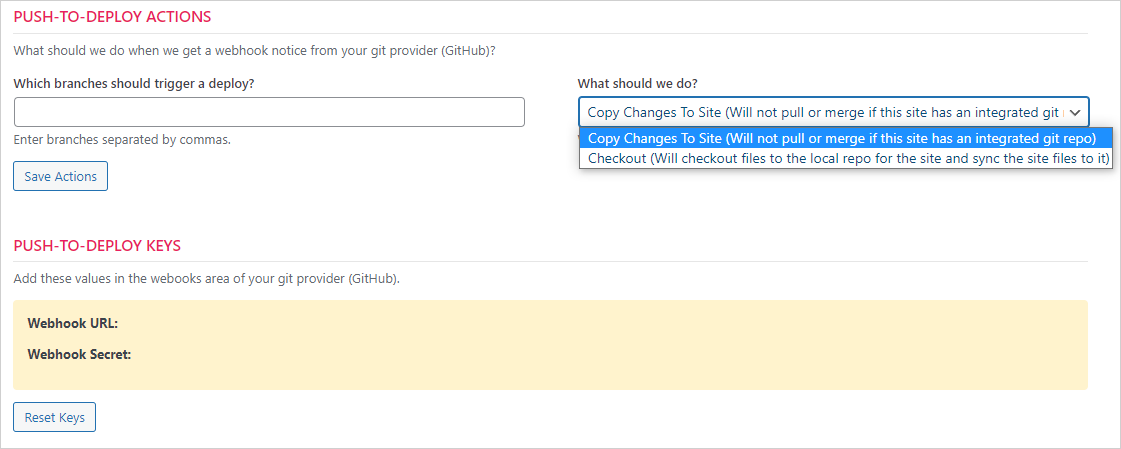
Push-To-Deploy Actions
You need to set a branch name here – usually ‘master’ or ‘main’. And the option for “What Should We Do” needs to be set to FETCH (COPY CHANGES TO SITE).
Any changes that are pushed to the branch(es) listed here will automatically trigger an update to the files on your site.
After filling out the two options, click the SAVE ACTIONS button.
Push-To-Deploy Keys
Generate your Push-To-Deploy keys by clicking the RESET KEYS button.
These two items need to go into your GITHUB Webhooks settings screen. Usually this is under the repository SETTINGS area.
In there, add a new Webhook (the Add Webhook button is usually on the upper left.)
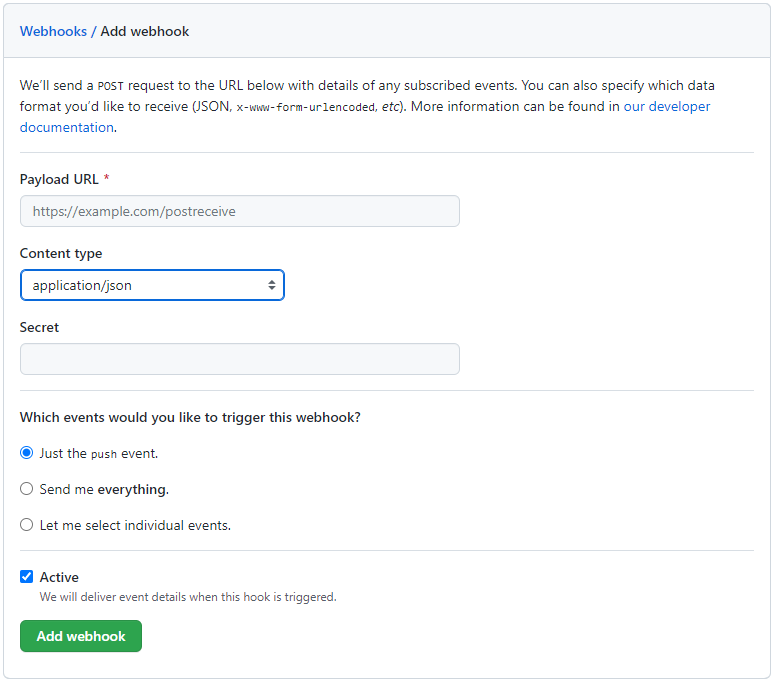
- The Payload URL is where you’ll enter data from the Webhook Url from our screen.
- The content type field MUST be set to application/json
- The secret field is where you’ll enter the Webhook Secret from our screen
- Leave the default events to Just the push event option.
Don’t forget to click the green ADD WEBHOOK button to save your settings.
Test
Change a file in your git repository. You should see the changes flow through to your site after a few minutes.
More Topics In Git Control

See Also