Template Sites (Product Templates)
Assuming you have installed all the WPCD Multi-tenant pre-requisites, the first step in your Multi-tenant journey will be to create at least one template site.
A WPCD Multi-tenant product template site site is a regular WordPress site with three differences:
- It has the TEMPLATE FLAG enabled. You can do this under the MULTI-TENANT tab for the site.
- It is integrated with Git. You can do this under the GIT tab for the site.
- It is the source from which all your tenant sites are built. This has some implications which we’ll explain further below.
So, step 1 is to create a regular WordPress site. You can do this from the server list screen – make sure it’s on the server you’ve designated as your template server.
Then, enable the TEMPLATE FLAG as follows:
- Navigate to your new site and click on the MULTI-TENANT tab
- Scroll down to the bottom of the tab where you’ll see the TEMPLATE FLAG section
- Toggle the switch
Next, you need to connect the site to GIT and a new or existing git repository on GitHub. The instructions below assume that you’ll be using a new repository.
- Enable the Advanced GIT options in your settings. You do this in the WPCLOUDDEPLOY → SETTINGS → APP: WORDPRESS SETTINGS → tab. While you’re there you might want to add your GIT settings so you don’t have to repeat it for every site.
- Next, install GIT on the template server. To do this go to your server and click on the GIT tab. After it is installed, you will see a new set of fields – you don’t have to fill them in if they’re the same values as the ones in your settings.
- Create an empty GIT repository on Github for your template site. Make sure you add a dummy file to the repo so you can initialize the repository tree. If you’ve selected to use their default readme file then you don’t have add a dummy file since a file is already present in the new repo. (See more about this process here.)
- Now you can initialize your template site with GIT. Navigate to the GIT tab on your template site, fill out the information (you can leave blank any field that is already specified in settings) and click the INITIALIZE GIT ON THIS SITE button.
At this point, you can start to setup your template. Periodically you can use the COMMIT & PUSH button to make sure your file changes are sent to your GitHub repository.
Assign A Product Name
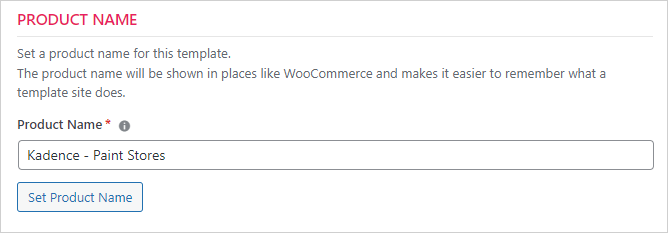
You can assign a user-friendly name to your template site. Just scroll down to the bottom of the MULTI-TENANT tab:
We will use this name in certain other screens in WPCD when working with Multi-tenant operations. Setting this is not a requirement for using WPCD Multi-tenant.
Using Your Local Development Environment
If you prefer to use your local machine for development you can continue to do so. You can push the files up to the same central (remote) repository that the template site is using. Then, you can use the GIT SYNC option on the GIT tab to sync the central (remote) repo to the template site.
Another option is to use any import-export or backup-restore plugin to move files and database data from your local dev environment to the template site. Then use the COMMIT & PUSH button on the GIT tab to send your file changes to central (remote) GitHub repository.
More Topics In Multi-tenant
See Also

