Recurring Site Images
Introduction
The Recurring Site Images feature allow you to configure a site to automatically capture and store images at specified intervals. For example, you might capture an image of your home page and store page every day.
If there are significant changes between the prior image and the most recent image, an entry is made into our notifications log (which can then be pushed out to you via email, Slack or Zapier).
Because images are stored, you can go back and review them should an issue be detected.
There are other uses for this feature:
- Track development changes to your site
- View what your customers see every day (just in case it’s different from what you expect)
- Capture terms and conditions or other legal pages to prove the contents at a particular point in time (can help with chargebacks for example).
Step 1: Setup Your API Keys
We use a service called htmlcsstoimage.com to capture web page images. If you don’t already have an account there you need to create one before you can use this feature.
Then go to the WPCLOUDDEPLOY→ SETTINGS → APP:WORDPRESS SETTINGS → INTEGRATIONS tab.
There you can enter the API keys for the htmlcsstoimage.com service.
One of the nice things about this service is all images live there – we do not store the images in the local WordPress MEDIA library.
Step 2: (Optional) Setup A Custom Schedule
Next, you can setup a custom schedule if one of the pre-installed ones are not suitable. WPCloudDeploy version 4.16 includes 4 pre-defined schedules
- Daily
- Every 60 Min
- Every 12 Hours
- Every Week (on Saturday)
You can create one or more custom schedules on the WPCLOUDDEPLOY→ SCHEDULES screen. Just click the ADD NEW button at the top of the list.
Step 3: Setup Your URLs
You need to tell WPCD which URLs you would like to capture for each site. There is an AUTOMATIC SITE IMAGES metabox on each site where you can do this.
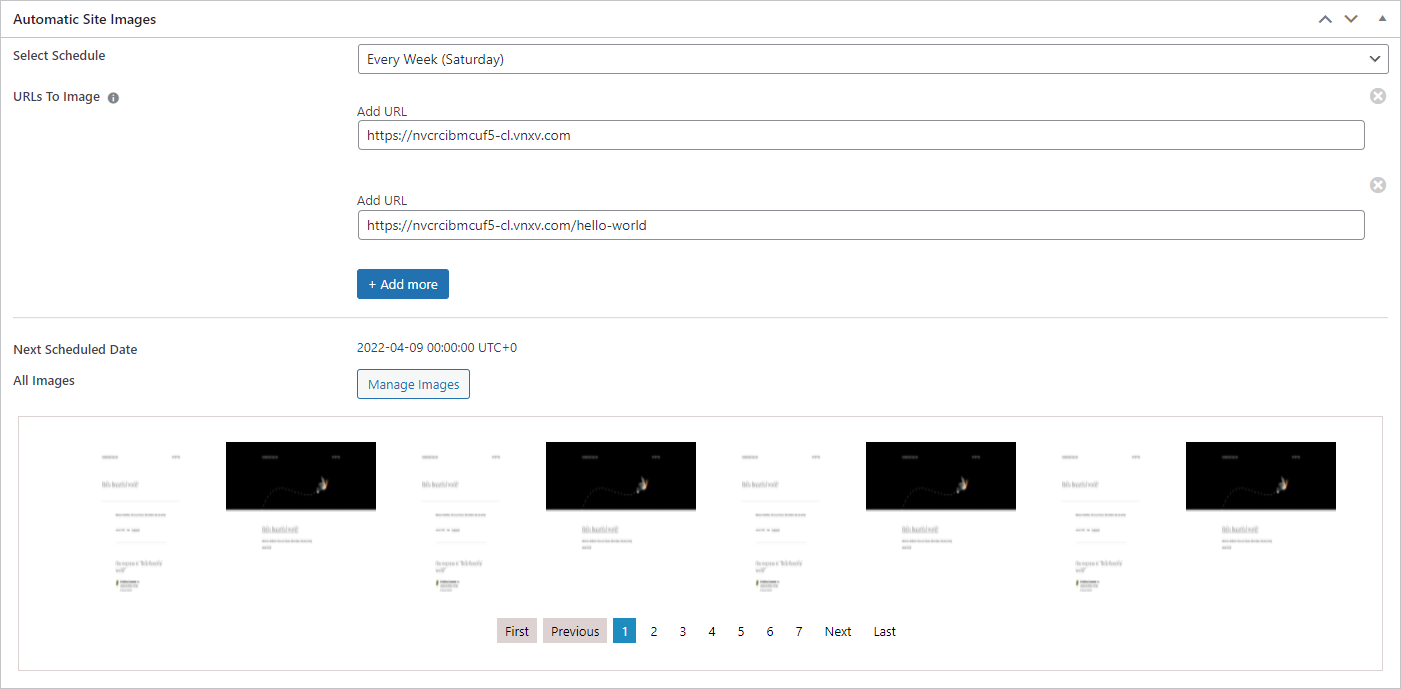
As you can see in the above image, you can enter multiple URLs for each site.
Don’t forget to save your settings using the UPDATE button in the upper right hand side of the screen.
Note: When you select a schedule we automatically calculate the next date on which to capture images. But, that is not locked in until you save your settings!
Managing Site Images
As you can see in the image in the prior section you can scroll through images starting with the most recent ones first.
To delete images or see which image is different from the prior one click the MANAGE IMAGES button. You’ll be taken to a list of your images:
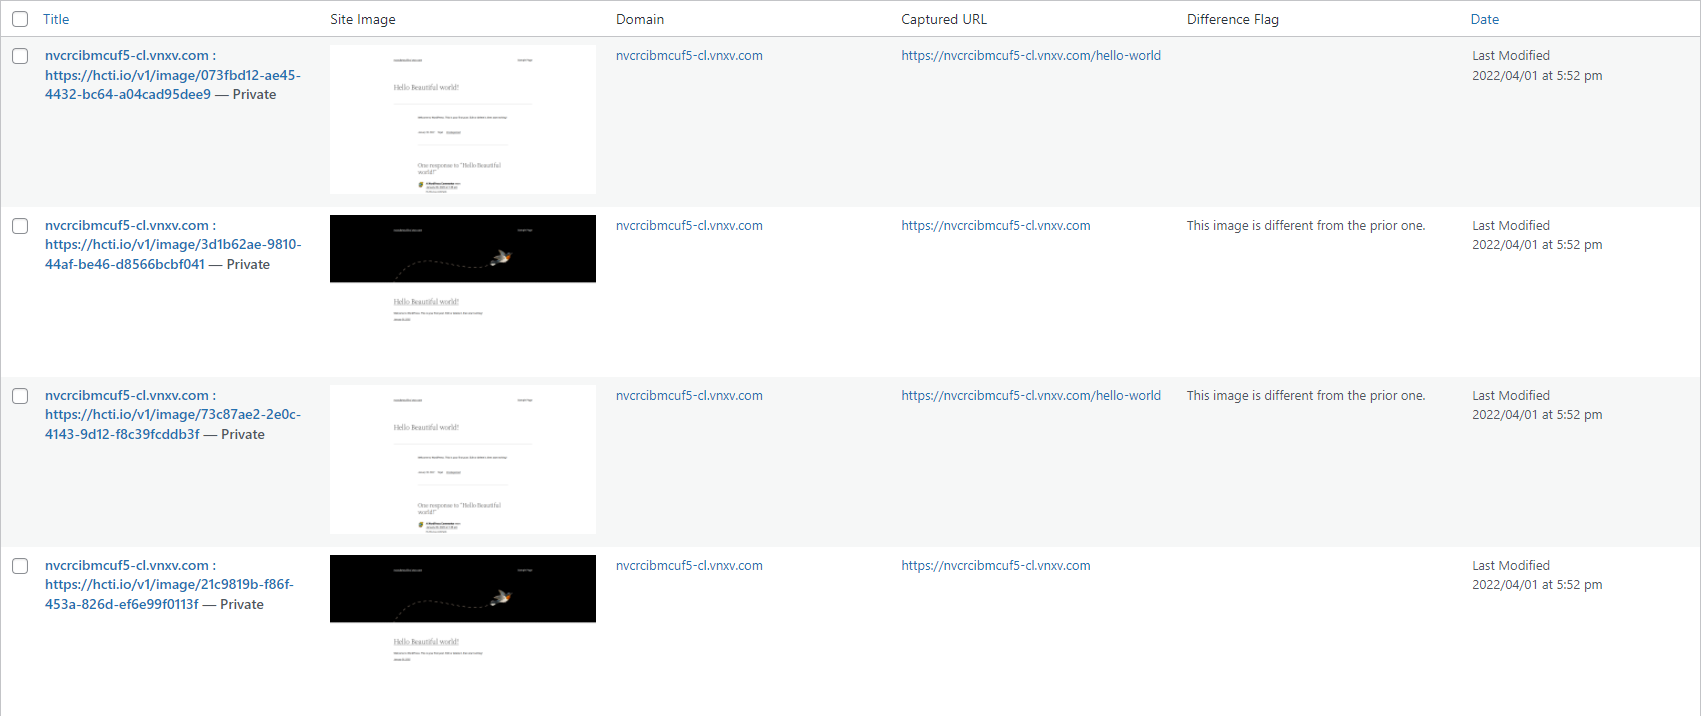
From here you can use the usual list tools to delete and filter images.
Limiting Image Records
If you set up images to be captured frequently you might want to limit the number you keep. You can do this in the WPCD settings area:
WPCLOUDDEPLOY → SETTINGS → APP: WORDPRESS SETTINGS → POWERTOOLS
In that location is a section for AUTOMATIC SITE IMAGES and in there you’ll see a field LIMIT THE NUMBER OF IMAGES FOR EACH SITE.
Just set that number and click the SAVE button at the bottom of the screen.

Other Settings & Functions
The WPCLOUDDEPLOY → SETTINGS → APP: WORDPRESS SETTINGS → POWERTOOLS tab is where you can tweak how this feature works or turn it off all together. Just scroll down to the AUTOMATIC SITE IMAGES section.
There, you can configure:
- The sensitivity that controls when two images are considered different (Max Pixel Variance and Max Pixel Percentage Variance)
- The width and height of the “browser” when we capture the image.
- Whether to show a count of the number of images collected in the sites list.
You can also control who can view the AUTOMATIC SITE IMAGES metabox under the WPCLOUDDEPLOY → SETTINGS → APP: WORDPRESS SECURITY → FEATURES tabs.
More Topics In Powertools
