Enabling Multisite
To enable multisite:
- We strongly recommend that you BACKUP your site before proceeding with the rest of these instructions
- Go to WPCloudDeploy → Applications
- Locate your site and click on the title to navigate to the detail page.
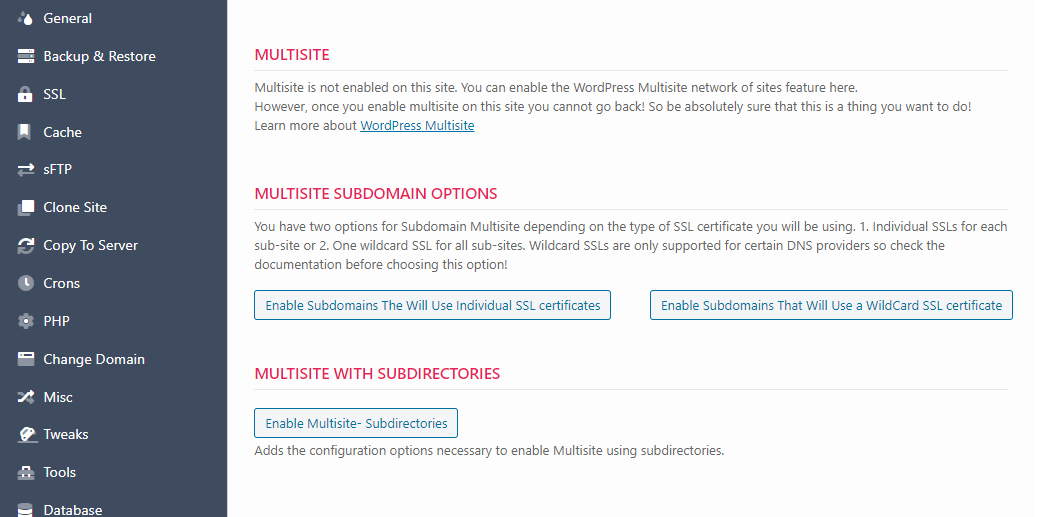
- Under the MULTISITE tab you will see three buttons – one for each type of Multisite. Click the button for the type of Multisite you need.
That should be it. When you log into the site again, you should see the network menu option in the WordPress topbar.
Notes
- If you are creating a new Multisite and not restoring an existing multisite from backup, we suggest that you enable Multisite before you add too many plugins or themes to your site. Many plugins and themes do not support Multisite cleanly so enabling Multisite with these installed might result in unexpected behavior. Or, worse, your site crashes because a plugin or theme that isn’t Multisite compatible throws a hard error.
- If your site already has SSL enabled, you will need to disable it before converting it to a multisite. You will not be shown any Multisite options until SSL is disabled. Once Multisite is enabled, you will have a new, expanded set of SSL options in the MULTISITE tab.
- It is recommended that your PHP memory allocation be at least 256M and that wp-config memory limit options be configured to also allow for at least 256M.
More Topics In Multisite
Share:


Search