Virtual Cloud Providers
Introduction
The Virtual Cloud Providers add-on is the mechanism by which multiple accounts can be handled for the same cloud service.
Some reasons you might need this:
- You have multiple departments or branches in your company, each with their own cloud-service account or budget.
- You have customers that want to use their own accounts
- You have separate accounts for development, staging and production.
Installation
The Virtual Cloud Provider add-on is just a regular WordPress plugin – upload and activate it from the WordPress PLUGINS screen.
Creating Virtual Cloud Providers
When the add-on is activated a new option will appear under the WPCloud Deploy menu item. Click on it and then click the ADD NEW VIRTUAL CLOUD PROVIDER button at the top of the screen. This will bring you to a screen that looks like this:
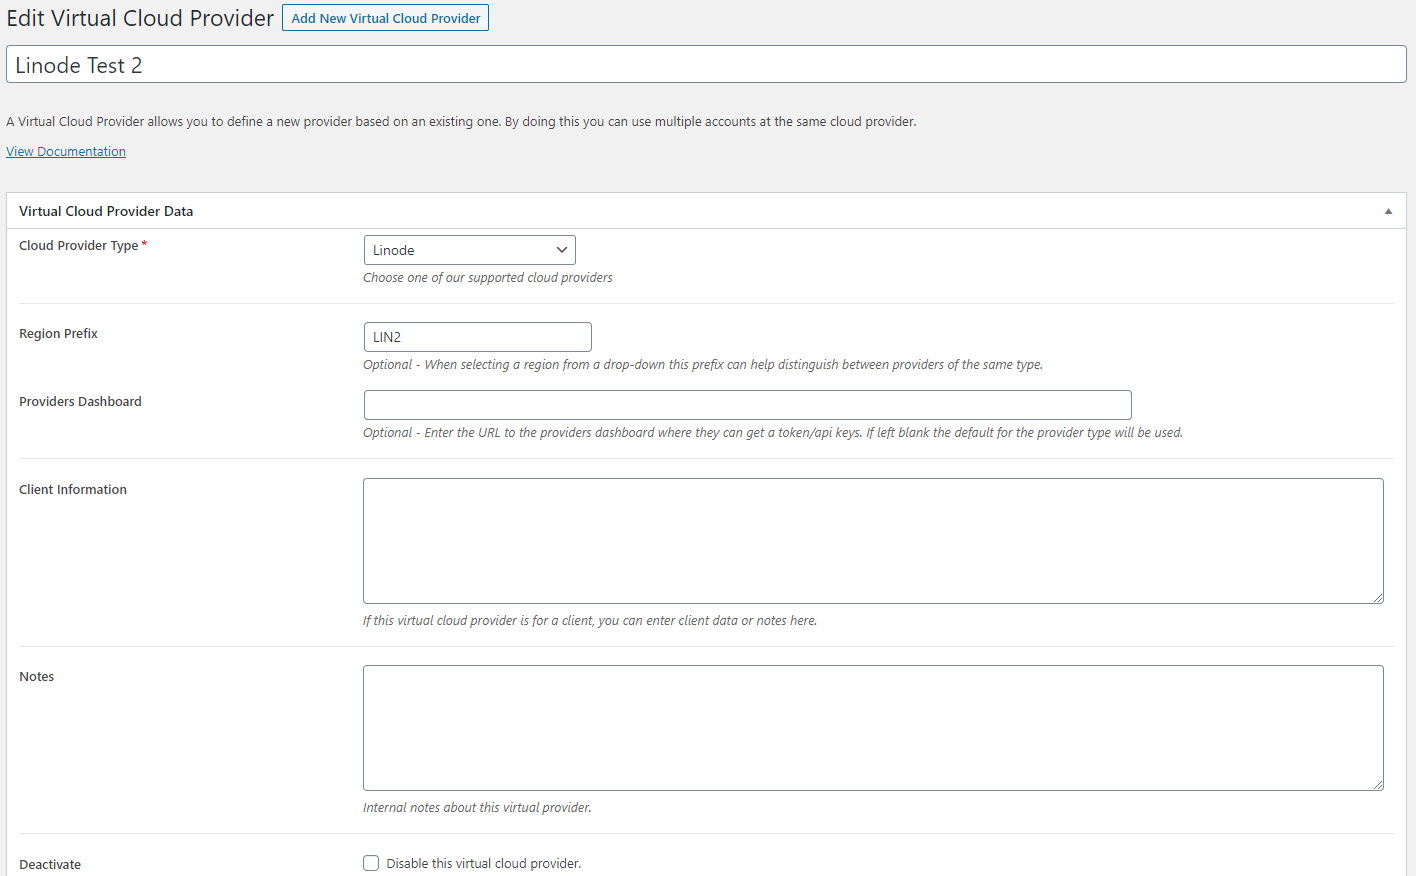
The two important items here are:
- The name of the Virtual Cloud Provider
- The cloud provider type (i.e: DigitalOcean, Linode, AWS EC2 etc.)
All other fields are optional.
Click the PUBLISH or SAVE button and the virtual provider will be created.
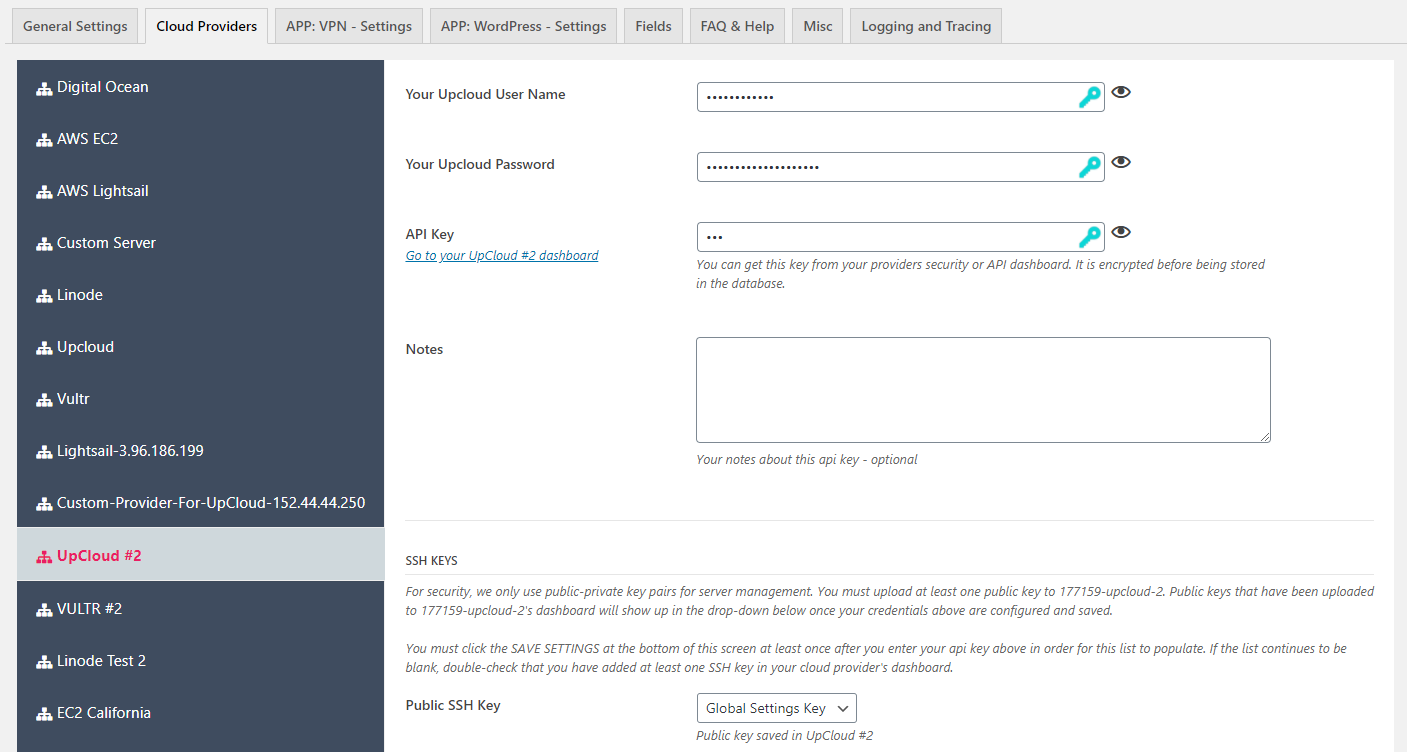
Connect the virtual provider to an account
Once you have created the virtual provider, you will need to connect it to an account, just like you would for any other provider. This can be done under the SETTINGS screen.
Go to WPCLOUDDEPLOY → SETTINGS → CLOUD PROVIDERS tab. Your new virtual provider should be listed just like regular providers – other than the name, there is no distinction between them.
Notes
- You should use a different set of API credentials for each virtual provider. We cache data based on those API credentials. For most cloud providers such as DigitalOcean and AWS, you can create new API keys to get access to the same account. For others such as UpCloud you’ll need to create entirely new accounts. Normally you don’t need to use virtual providers to access the same account (there’s little point to it) but, in the case of AWS, GOOGLE CLOUD, AZURE and ALIBABA, you would need to do so in order to set up one for each region.
- We strongly advise against deleting virtual providers after they are created and used on a server. If you must delete one then make sure that all servers that use it have been deleted prior [to attempting to delete the provider.]
More Topics In Admin
- Restoring From AWS S3 Into A New Site or Server
- Backups With AWS S3
- Restoring From Backup
- 6G Firewall (Deprecated)
- 7G Firewall
- Native Linux Cron
- Disabling Sites
- Password Protect A Site (HTTP Authentication)
- One-click Login (AKA Passwordless Logins)
- Remove/Delete Site
- Manage PHP Options
- Add A WordPress Administrator
- Notifications and Alerts
- Managing WordPress DEBUG Flags
- Object Cache: MemCached
- Object Cache: Redis
- Monit / Healing
- DNS Integration: CloudFlare
- Site Packages
- Site Update Plans
- Site Expiration
- White Label Colors
- Adding Custom NGINX Configs
- Custom Servers (Bring Your Own Server)
- How To Change The IP Address For Your Server
- Monitorix
- File Manager
- PHPMyAdmin - Database Operations
- Using Remote Databases
- SMTP Gateway
- Server Updates
- Theme & Plugin Updates
- Bulk Actions on Servers
- Bulk Actions on Sites
- SSH Key Overrides
- Webserver Types
- WPCD Cron Jobs
- Disk Quotas
- Custom Post Type Quotas
- Using Post-Processing Custom Bash Scripts
- Bulk Copy To Server
- Copy To Server (Automated Daily Process)
- Shortcodes
- Bootstrapping A WordPress Server With Our Scripts
- Bootstrapping A WordPress Server With Our Scripts - Archive Version 4.x
- Free Setup Requirements & Checklist
