When you run a WordPress site, it is a fact of life that bad actors will attempt to break in. Luckily most of them use dumb, automated tools that attempt to brute force their way into your system.
As long as you have a long, unique password, your site is usually safe.
But those attempts can number dozens a second which impacts the performance of your site.
As luck would have it though, most tools use a special mechanism in WordPress to automate their break-in attempts. And that mechanism can be turned off.
The name of that WordPress mechanism is XMLRPC.
Eons ago, WordPress created this feature to allow non-wp sites to talk to it. But it is rarely used now – Jetpack is probably the only well-known tool that use it these days.
So, if you don’t use a plugin or theme that requires it, you should turn it off.
There are a few ways to turn it off. One of the most common methods is via a plugin. But that means that the break-in attempts still hit your site and your site still has to spend some computation cycles handling each request.
Our preferred approach is one where the traffic never even gets to your site in the first place.
Website Proxies
The fastest way to prevent bad traffic from hitting your server or site is to let someone else filter it out for you. Our favorite tool for this is CloudFlare. It’s a free Website Proxy that allows you to define a few custom firewall rules for filtering bad traffic.
And, by using it, bad traffic never hits your site in the first place.
To use this tool, you need to modify your DNS to point to Cloudflare and then let CloudFlare do its thing. When you register your site on CloudFlare, it will walk you through the steps to change your DNS and start funneling all your traffic through it.
Once your site is registered on there, you can add a FIREWALL rule to prevent xmlrpc traffic from ever hitting your server and site.
To add this firewall rule:
- Log into CloudFlare and access your site’s dashboard. (If you’ve never used CloudFlare before you will only have one site in your account.)
- Click on the FIREWALL icon
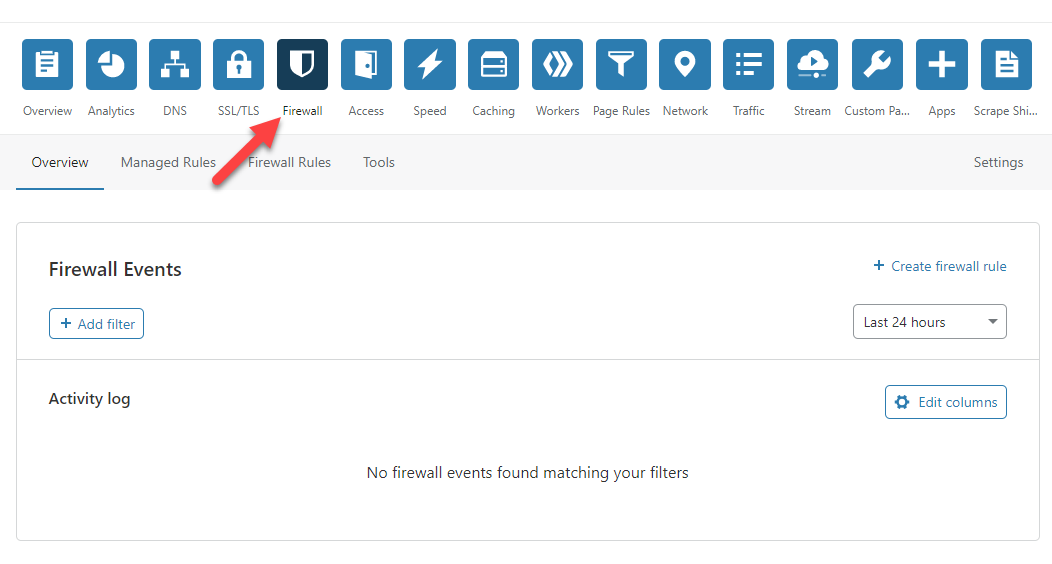
- Click the FIREWALL RULES tab

- Click the CREATE A FIREWALL RULE button
- Give the rule a NAME – eg: Block XMLRPC
- Fill out the FIELD, OPERATOR and VALUE settings as shown in this image:
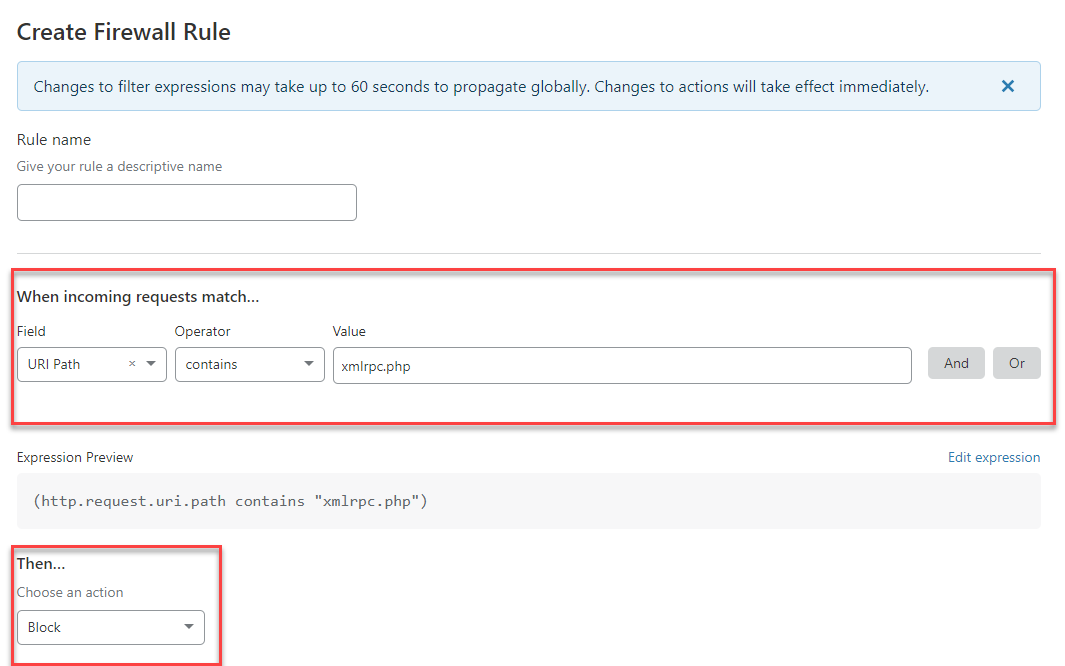
When done, simply click the DEPLOY button at the bottom of the screen.
In about 60 seconds you’ll start to see the benefits. If you have a security plugin like WordFence or iThemes that bombard you with emails about break-in attempts, you’ll likely notice a substantial drop-off in those notices!
Was This Article Useful? Or do you have questions or comments about it (or our products & services)? We'd love to hear from you!
Automatic Notification Of New Articles
Sign up to get automatic notifications of new articles. This is a different list than our standard list - you only get new articles once a week (usually on Mondays). No other emails will be sent unless you sign up for our general list as well.
Follow us on Twitter! We post a lot of cool things there first. To keep up, click the "X" below!