How To Setup Products
Setting up products in WPCloudDeploy Momentum is a bit more complex than you probably expect it would be. This is because we want to provide as much flexibility as possible:
- We want to bypass the WooCommerce storefront and go directly from the pricing page to the cart
- We want to have upgrade and downgrade options – this means using WooCommerce GROUPED Products. WooCommerce Grouped Products have complex URLs
- We want the flexibility to associate multiple templates with a single industry and vice-versa
In order to make this work we have to create a bridge between industries, templates, pricing pages and WooCommerce.
Still, you can break down setting up product into three components:
- Create individual products inside WooCommerce linked to our template sites
- Create a grouped product inside WooCommerce the combine the products created in step one
- Create product links and assign template images
The entire process is more tedious than it is hard. And a lot of it is copy-and-paste or using a DUPLICATE function.
Before you can do any of that though, you have to setup your industries. If you’ve requested that industries be removed from your workflow then you can skip this step.
Setup Industries
- Navigate to WPCD PRODUCTS → INDUSTRIES
- Give your industry a name and add at least one image with the industry name in it
- Click the ADD NEW INDUSTRY button at the bottom of the page to save it.
Here is an example of how industries will be displayed as the user progresses through the checkout process – notice that it is a 3-column grid.
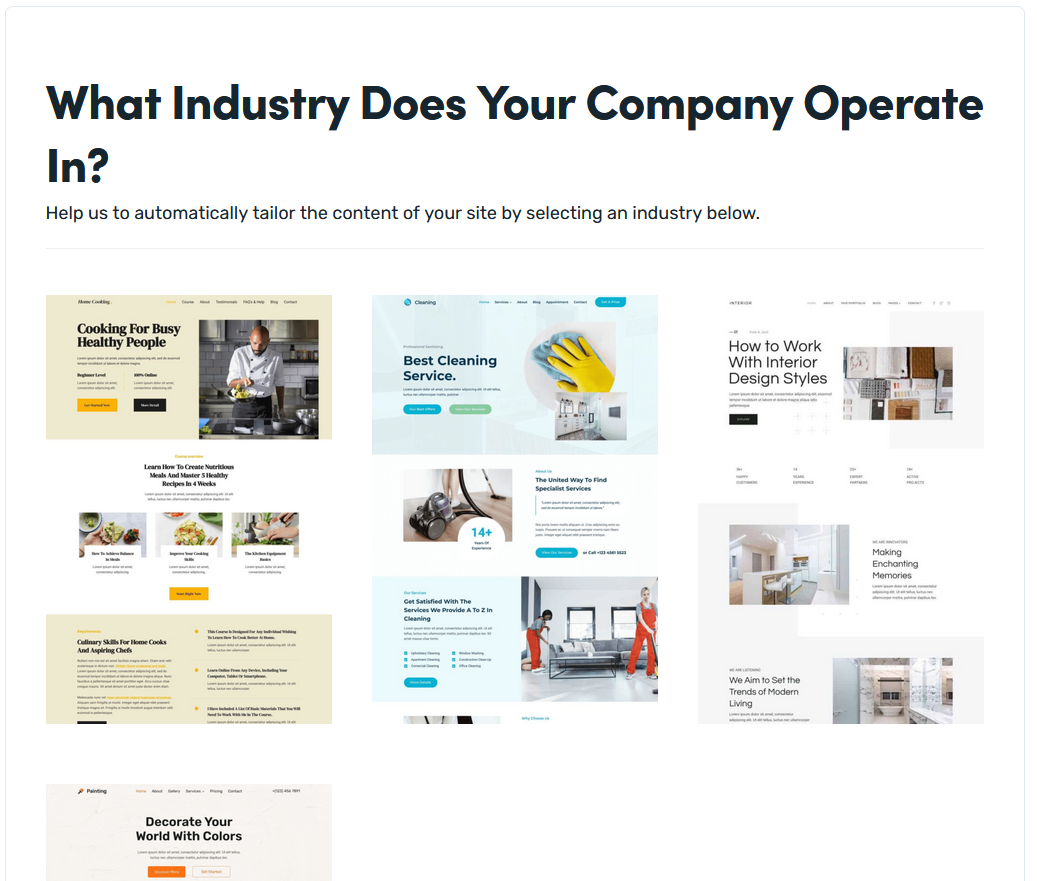
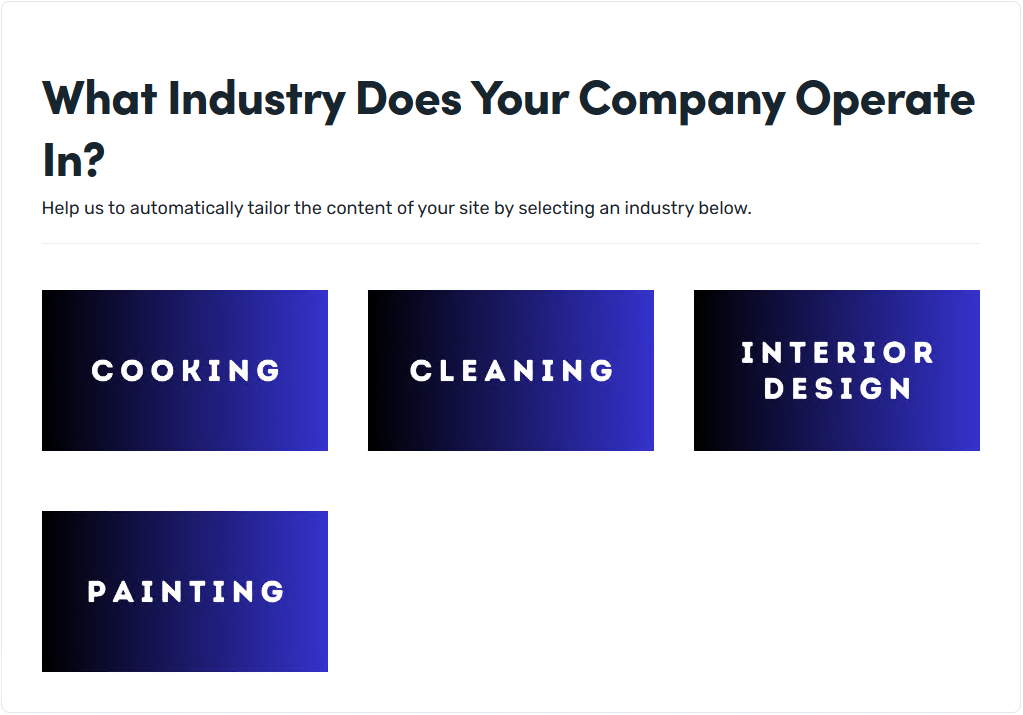
In this example we are using images that are the same as the template images. Most admins will likely just use solid or gradient images with the industry text on it and a small image or icon. Here is an example of a more minimalistic layout:
Setup Individual WooCommerce Products
Let’s assume you have a 3-tier pricing plan, imaginatively titled “Starter”, “Premiere” and “Professional”.
For each template you have, you will create THREE individual WooCommerce products – one for each pricing plan level.
If you are offering 6 templates across various industries, this means you’ll create 18 products (6 templates X 3 price levels).
To setup a single product in WooCommerce:
- Navigate to the PRODUCTS → ADD NEW screen.
- Enter the PRODUCT NAME – eg: Interior Design Medium.
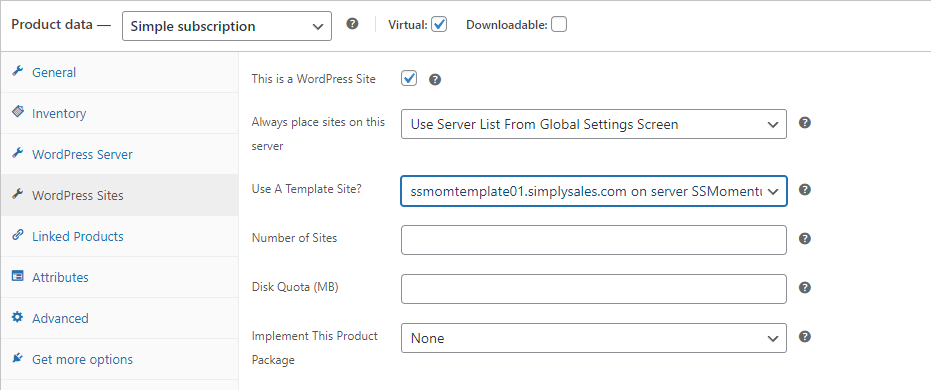
- Products must be of type SIMPLE SUBSCRIPTION.
- The checkbox for THIS IS A WORDPRESS SITE located under the WORDPRESS SITES tab must be turned on.
- Click on the Inventory tab to enable stock management – turn on the option for Sold Individually.
- In most cases you would want to check the VIRTUAL option as well since it’s not something that is being shipped.
- In the PUBLISH metabox in the upper right, set the CATALOG VISIBILITY option to HIDDEN – this prevents the customer from accidentally locating the individual product screen and using it for checkout.
Since we would have already setup at least one product for your installation, you can usually use the DUPLICATE option in the product list.
Setup Grouped Products
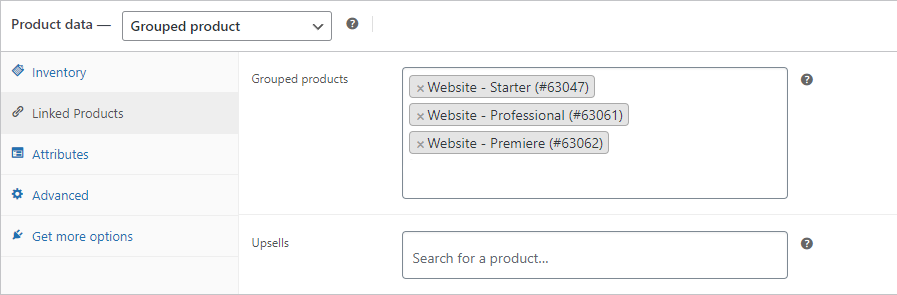
Once you have created at least one product for each price level for your template(s), you now need to create a GROUPED product for each template.
The components of the grouped product will be the individual products you setup in the prior section
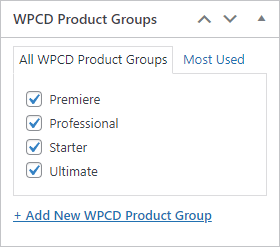
Setup WPCD PRODUCT GROUPS
Before we can setup the BRIDGES that link industries, templates, pricing pages and WooCommerce, we need to setup WPCD PRODUCT GROUPS. These groups will map to your pricing plan levels.
So, in the example above, you’ll setup three WPCD PRODUCT GROUPS – “Starter”, “Premiere” and “Professional”.
To create a WPCD PRODUCT GROUP, navigate to WPCD PRODUCTS → NEW PRODUCT GROUP
Setup one group for each pricing plan.
Setup Bridges
We mentioned at the beginning of this document that we need to create a bridge between industries, templates, pricing pages and WooCommerce. The mechanism for that bridge is the WPCD PRODUCTS screen.
You will create one WPCD PRODUCT for each template and pricing level combination.
In the example we’re using with three pricing levels and one template, you’ll create three WPCD PRODUCT entries.
To create your first WPCD PRODUCT bridge just navigate to WPCD PRODUCTS → ADD NEW PRODUCT
The first field you have to fill in is the TITLE. You should use something that comprises of the Template type or type and the price level – eg: INTERIOR DESIGN – STARTER.
The next field is the PURCHASE LINK.

The purchase link is tricky – it consist of three parts:
- The base url
- The product ID of the grouped WooCommerce product
- The product ID of the component product inside the grouped product.
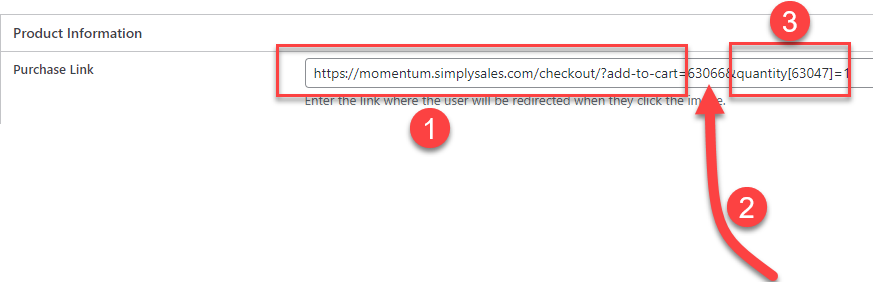
In the image above:
- This is the base URL. You’ll notice that it composes of the URL to your primary WPCD site followed by /checkout/?add-to-cart=
- This is the WooCommerce product id of the WooCommerce GROUPED product followed by “&”.
- This is the product id of the a component of the grouped product in the format quantity[id]=1
Assign WPCD PRODUCT GROUPS
You should assign each WPCD PRODUCT to a single WPCD PRODUCT GROUP (which you created in the prior section above.) Since the purchase link will only add one WooCommerce product to the cart, selecting multiple WPCD PRODUCT GROUPS will not work – this is because the WooCommerce product being added to the cart will only belong to a single plan. So each product bridge setup must only be associated with a single plan.
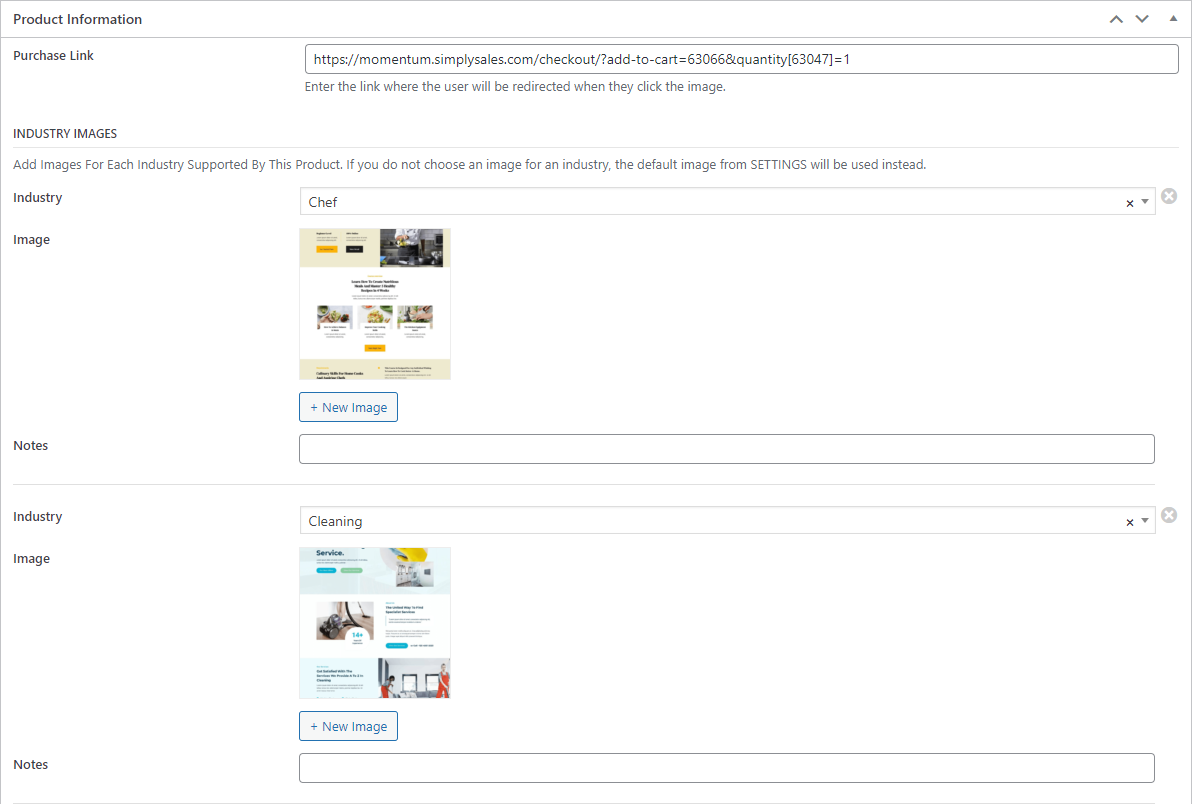
Assign Template Images
For each industry you’re supporting, you’ll need to add a template image. This is the image the customer will see when they go through the checkout process.
Pricing Page
All of the product setup you’ve done so far is in support of creating a pricing page that bypasses the WooCommerce storefront.
Here is an example of a pricing page – the key is the URL in the button. This section will discuss how to construct that URL.
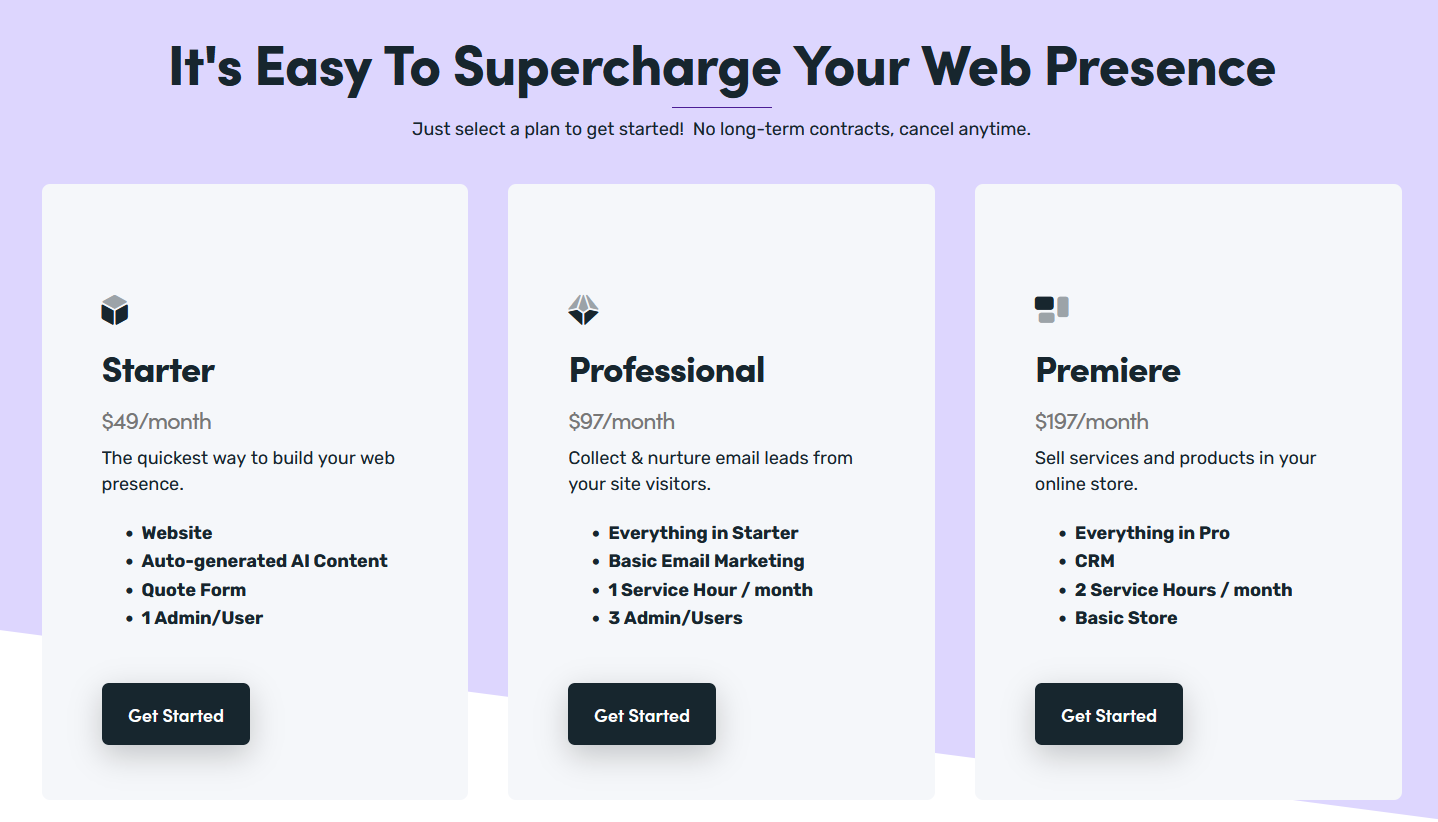
The three links in the three buttons above are:
- [baseurl]/display-templates?wpcd_display_template_action=industry&wpcd_display_template_plan=starter
- [baseurl]/display-templates?wpcd_display_template_action=industry&wpcd_display_template_plan=professional
- [baseurl]/display-templates?wpcd_display_template_action=industry&wpcd_display_template_plan=premiere
The difference between the three links is the PLAN – you’ll notice at the end, each references a different plan. These plans are the SLUGS of the WPCD PRODUCT GROUPS.
How It All Fits Together
When the customer clicks on a button on the pricing page, the system knows what PLAN the user clicked on because the plan slug is in the URL.
When the customer selects their industry from the INDUSTRY Page (a sample shown earlier above), the plan slug is passed along to the next step (select template)
The plan slug is used to select WPCD PRODUCTS and from those products, template images that match the industry are selected. These are the images that the customer is shown so that they can select a template. For the simplest setups, there will only be one template.
By doing things this way, you can place the pricing URLS anywhere – even on other sites and landing pages. And they will all bypass the WooCommerce store front while harnessing the flexibility of WooCommerce (coupons, upsells & downsells, flexible subscription periods, trials, payment gateways etc.)
Notes
- If this all seems complex to you, don’t worry too much about it. We’ll have set up a lot of this for you as part of the MOMENTUM service package. You’ll likely just do light editing for things such as product descriptions and pricing levels.
- While it may not be immediately obvious, the tedious product setup process allows for a single template to support multiple industries and use-cases. For simple setups, there will be one template per industry but for experienced developers, a single template can be used to support multiple industries.
More Topics In Momentum
- About WPCloudDeploy Momentum
- No-Charge Customizations
- The Workflow In Pictures
- Template Sites
- About The Todo List
- Replacement Tokens
- AI Tokens
- Custom AI Tokens
- AI Featured Images
- Custom AI Images
- Settings
- WP-CONFIG.PHP Entries
- Customizing The Onboarding Form
- Default Form Questions
- Theme & Page Builder Compatibility
- Default Color Palettes
- Misc
- Automatic Updates & Support
